Tuesday, December 27, 2011

Chanukah Christmas doughnuts

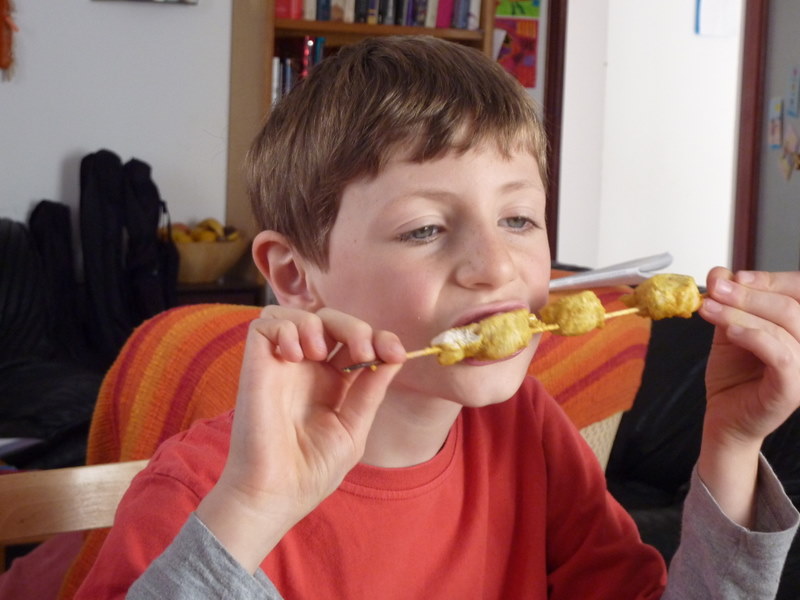
This year Chanukah and Christmas have overlapped, so we have had our menorah and our advent candle burning at the same time. But why stop there? In the spirit of cultural fusion, I decided to fill some of my traditional Chanukah doughnuts with mincemeat to make a deep-fried Jewish alternative to mince pies. You could, of course, use jam or even just pop a square of dark chocolate into the middle.


Ingredients
for the dough
7g instant yeast
250ml warm milk
20g sugar
2 eggs
15g vegetable oil
500g plain flour

for the filling
mincemeat or jam or half a square of dark chocolate

for frying
vegetable oil

Method
  1. In a large bowl, mix the dough ingredients thoroughly, and knead briefly (still in the bowl) until you have a smooth dough.
  2. Cover the bowl and leave dough to rise for about 1 hour.
  3. Divide the dough into 12 balls, and flatten into discs.
  4. Place a teaspoon of mincemeat or jam in the centre of the disc, bring the edges up to form a ball, and press together to seal.
  5. Transfer to a well-floured tray and leave to rise for about 30 minutes.
  6. Heat plenty of oil in a deep fat fryer or large saucepan until it is medium hot (about 170oC), and fry the doughnuts in batches for 3 minutes, before turning them over and frying for a further minute.
  7. Drain, sprinkle with caster sugar and serve.
Kosher dilemma
My original plan had been to make jam doughnuts and mince pies, before I realised that the lard I use in my mince pie pastry with is made from pig fat and therefore not eligible for being served to my grandma. I did briefly consider going on a hunt for a kosher alternative before I hit upon the idea of combining the two in a sweet festive smorgasbord of Judeo-Christian cultural mestizaje. Needless to say, my grandma would have nothing to do with my carefully concocted mincemeat donuts, and insisted on jam.

Parsnip and ginger soup

Santa brought me the new River Cottage Veg every day! cookbook. I haven't seen the TV programmes yet, but the book looks great and I'm hoping it will inspire me to find new ways of turning my veggie box into delicious meals.


The first thing I cooked from it was this delicious parsnip and ginger soup. I've toned it down a bit as the version in the book was a little zingy, and left out the milk because the soup already seemed thick enough at that stage.


Ingredients
olive oil
1 onion
2 cloves of garlic
1 teaspoon of finely chopped fresh ginger
1/4 tsp ground cardamom
1/4 tsp ground cumin
1/4 tsp chilli powder
500g parsnips
800ml vegetable stock
salt
pepper
2 tablespoons of flaked almonds

Method
  1. Finely chop the onion, and gently sautee in plenty of olive oil. When it is just about done, add the finely chopped garlic and ginger and fry for another minute or so.
  2. Add the cardamom, cumin and chilli, fry for 30 seconds, then add the parsnips.
  3. Fry for a few seconds more, add the stock, bring to a boil, cover, reduce heat to minimum and simmer for 20 minutes until the parsnips are cooked.
  4. Allow to cool, then liquidise with a stick blender. Test for seasoning and add salt if necessary.
  5. Reheat, and serve with a sprinkling of the toasted almond flakes and some freshly ground black pepper.

Monday, December 26, 2011

Spanish beef stew with rosemary and olives


We've had roast goose for the last couple of Christmases but this year, as the date approached, none of us were really attracted by the stress of trying to coordinate timing the cooking of a large bird with the process of marshalling ten people to the dining table to eat it. So I decided to make a stew instead. I wanted something with plenty of flavour, with a nice thick sauce and with some hints of Spain. This was what I came up with. (The anchovies don't give a fishy flavour, but just help to intensify everything else.)


Ingredients
3 kg beef
1 bottle of red wine
50g fresh rosemary stalks
plain flour
1 head of celery
2 large onions
6 cloves of garlic
2 red peppers
3 tsps paprika
100g tomato puree
6 salted anchovy fillets
250g of olives, drained and rinsed

Method

  1. Cut the beef into  chunks, and place in a large bowl. Add the rosemary, olives and wine, mix well and leave to marinade in the fridge overnight.
  2. The next day, drain the meat in a colander, reserving the marinading liquid, rosemary stalks and olives. Leave the meat to dry for a few hours if possible.
  3. Brown the meat in batches in hot olive oil (about 0.5 kg at a time, depending on the size of your pan). Dredge the last two batches (about 1 kg of the meat) in flour before frying. (This will help to thicken the sauce of the casserole.) Transfer the cooked meat to a bowl.
  4. Meanwhile, transfer the marinading liquid, rosemary and olives to a saucepan, bring to a boil and simmer until reduced by about 1/3. Remove the olives and rosemary. Set aside the olives to serve with the meat if you wnt to.
  5. Finely chop the celery, onions, garlic and red peppers, and sweat throroughly in plenty of olive oil in a large saucepan or flameproof casserole dish. When the vegetables are cooked, add the paprika and tomato puree, mix well, and add the reduced marinating liquid, the browned meat (together with any juices), and the finely chopped anchovy fillets.
  6. If cooking on the stove top, add 250 ml of water, bring to a very gentle simmer, cover and cook at a very low heat for about 3 hours, until the meat is tender. You will need to be careful that the flour does not burn, so you will need to keep a close eye on the stew, making sure you stir it from time to time, and adding a little extra water if necessary..
  7. If cooking in a casserole, preheat the oven to 150oC, cover the casserole dish and cook for about 3 hours, until the meat is tender.

Saturday, December 24, 2011

Victorian mulled wine

It annoys me when something old and traditional is repackaged and sold as if it is new and exotic, especially if the new version is inferior to the old one. Every year I go through Halloween trauma, when the shops are filled with garish orange pumpkins and plastic vampire teeth, and my suffering is only slightly relieved by being able to buttonhole the occasional American and lecture them on the Scottish origins of the festival and the joys of turnip carving. Last year I was lucky to have a resident American in the form of Kaya's dad Jordon to play this part, and this year the role has been filled by our new friends Beth and Josh. I apologies to all of you for making you the recipients of my curmudgeonly rantings.

With Halloween barely over it is German Christmas Market time in Edinburgh and just about everywhere else in the UK (or Weihnachtsmarkt as they call it in Frankfurt). I'm partial to the odd bratwurst myself and am quite happy to browse stalls loaded with little wooden Christmas ornaments, but I draw the line at their  gluhwein. The problem starts with inferior wine, and is then compounded by excessive sugar, heavy-handed spicing, and stewing the wine. The result is a mug of expensive cough medicine.


So I decided to make some traditional Victorian mulled wine. The sugar, spices and citrus should be identifiable without being overpowering or sickly, and preparing a syrup which is then strained and added to the wine, which is in turn gently heated, has a number of advantages. You don't get any of the nasty bitterness from leaving the spices and citrus sitting around in the wine, you are not at risk of choking on the whole cloves floating around in your drink and, last but not least, you don't reduce the alcohol content of the wine by cooking it off.

Ingredients
250ml water
175g brown sugar
6 cinnamon sticks
2-inch chunk of fresh ginger, peeled and sliced
1 teaspoon of cloves
zest of 1 orange
2 bottles of red wine (I used a Chilean merlot)

Method

  1. Combine the water, sugar, cinnamon, ginger, cloves and orange zest in a small saucepan. Bring to a boil, reduce to a simmer and cook until you have a thick syrup.
  2. Pour the wine into a large saucepan, strain the syrup into it, and heat well but take care not to boil or to allow it to simmer. Serve immediately or turn off the heat and cover the pan.
Photo credits
Together with my mulled wine, this photo features Gemma's handmade Scandinavian wooden advent calendar.

Monday, December 19, 2011

Marmalade

A glut of oranges appeared in our fruit bowl the other day. They had been acquired to make Christmas decorations out of (stuck with cloves and suspended around the house from festive ribbons) but there were plenty left over, so I made some marmalade. The recipe comes from Lynda Brown's Preserving Book.


Ingredients
(makes 4 small jars)
1 kg oranges
2 lemons
1.2 litres water
1 kg granulated sugar
2 tablespoons of whisky

Method
  1. Halve and juice the oranges and lemons, set aside the juice, and tie the pith and pips from the juicer in a muslin square.
  2. Put the orange and lemon shells into a large pan, add the water and the muslin bundle, bring to the boil, and simmer with the lid ajar for 1 hour.
  3. Discard the muslin bundle, and strain the shells through a colander over a bowl to collect the liquor.
  4. Allow to cool, remove any mushy pith from inside the shells with a spoon and discard, then cut each shell into three segments, and slice each crosswise very thinly.
  5. Meanwhile, sterilise at least four 450g jars, together with their lids and any other equipment, and place a few saucers in the freezer to use for testing the set.
  6. Return the sliced peel to the pan, together with the reserved liquor. Add the fruit juice and the sugar, and heat gently until all the sugar has dissolved.
  7. Bring to a fast boil and cook for between 5 and 20 minutes until you have achieved a set. (To do this, drip a few drops of the marmalade 'juice' onto the cold plate. Leave to cool for a few seconds. If it is ready, then the surface will wrinkle when you push the drop with your fingernail. Or you can just stick your finger in it and see if it has a slightly sticky, jammy consistency rather than a syrupy one. It may take a good 20 minutes of boiling to reach the setting point; keep testing at regular intervals and make sure you don't overcook it.)
  8. Once you have a set, turn off the heat, skim any scum from the surface, and allow the marmalade to sit for about 15 minutes. Add the whisky, stir well to make sure the peel (and the whisky) are evenly distributed, and transfer to your sterilised jars.

Thursday, October 20, 2011

Caramelised onion chutney

I'm too tired to write a proper intro for this recipe. Why? Today I have been on a canal trip with our home educating friends, spent the afternoon in a couple of chilly playgrounds (thank the Lord for long johns!), followed by a lengthy game of football in the park. On arriving home, I had to carry two flatpack beds up two flights of stairs, help to assemble them both, then make supper. And somewhere in the middle of all that I made some onion chutney too.


Ingredients (makes 2 or 3 jars)
1.25kg onions
olive oil
4 tsps minced ginger
2-4 tsps minced red chilli (depending how spicy you want it)
4 tbsps tomato puree
100 ml red wine
2 cinnamon sticks
pinch of salt
200 ml balsamic vinegar
200g dark brown sugar


Method
  1. Peel and roughly chop the onions. In a large pan, gently fry the onions in plenty of olive oil. When they have softened, add the ginger, chilli and tomato puree, and continue to fry until the onions are well done.
  2. Add the wine, cinnamon, salt, vinegar and sugar, bring to a boil, reduce to minimum and cook for an hour or so, stirring frequently, until the onions begin to get a jammy consistency.
  3. Transfer to sterilised jars and store for at least 4 weeks (if you can wait).

Wednesday, October 19, 2011

Banana and apple cake

Autumn is definitely here, and yesterday we went for a lovely long walk around Roslin Chapel, where we collected lots of sticks for wands, together with a selection of leaves and nuts. It's seven years since I have been in Scotland at this time of year, and I had forgotten how beautiful it can be. (We've been lucky, with reasonably mild temperatures and a lot of dry days.)

I usually make this with bananas only, but today is Wednesday, which means it's time to finish off any leftover fruit and veg before our new veggie box arrives. In addition to two very ripe bananas, there were also some delicious little russet apples, so I added them to the mix.

Ingredients

275 g self-raising flour
1/2 tsp salt
110 g margarine
225 g caster sugar
2 eggs
2 ripe bananas, mashed
2 tart apples, peeled, cored and diced
75 ml milk
1.5 tsps lemon juice
1 tsp ground cinnamon
1 tsp ground ginger
50 g raisins

Method
  1. Set the oven to 180oC and grease a loaf tin. (Mine is stuck in the cellar at the moment, hence the round cake tin in the photo above.)
  2. Sift the flour into a bowl and add the salt.
  3. In a separate bowl, cream together the margarine and sugar. Add the bananas, milk, eggs, lemon juice, vanilla extract, cinnamon and raisins to the margarine and sugar mixture, and mix well. Fold the flour into the resulting batter.
  4. Pour the mixture into the tin, and bake in the preheated oven for 60 minutes until golden.

Monday, October 17, 2011

Orange polenta cake

I first made this cake a few years ago, and have baked it intermittently ever since (whenever my children allow me to make something other than chocolate cake).


I took this cake along to the book group I have just joined (at Blackwell's on South Bridge, in Edinburgh). My cake was finished off almost instantly, which is more than can be said for this month's book - the diaries of Sofia Tolstoy, in which the wife of Lev Tolstoy spends 40 years complaining about her husband.

Ingredients
for the cake batter
2 large oranges
1 cup of strong green tea
6 green cardamom pods
6 eggs
150 g quick-cook polenta
150 g ground almonds
250 g golden caster sugar

for the syrup
1 orange
50 g caster sugar
50 ml water

Method
  1. Place two of the oranges in plenty of water, bring to the boil and simmer for one hour. Drain the oranges, cut into quarters and allow to cool.
  2. Make a cup of strong green tea, and add the cracked cardamom pods to it.
  3. Preheat the oven to 180°C, and line and grease a springform cake tin.
  4. Peel the orange quarters, remove the pithy centre and any pips, and puree in a food processor.
  5. Transfer the orange puree to a mixing bowl, add the polenta and 50g of cardamom-infused green tea, stir well and leave to sit for 5 minutes or so.
  6. Add the eggs, almonds and caster sugar and beat well. Pour the mixture into the tin, and bake for about 45 minutes.
  7. Meanwhile, zest the remaining orange. Make a syrup by heating the caster sugar, zest and water until the sugar is dissolved. Strain through a tea strainer to remove the zest.
  8. Allow the cake to cool before removing from the tin. Prick it all over with a toothpick, and pour the syrup over it.

Saturday, October 8, 2011

Apple and pear chutney

"Not impedimenta, sweetie. Expulso is the best!" Gemma is sitting on the sofa with her laptop, helping Sammy get to the end of Harry Potter and the Deathly Hallows on the Wii, Carmela is measuring herself against the doorpost to check whether she has grown in the last 3 days, and I am in the kitchen making chutney and listening to Fabrizio Andre singing Bocca di Rosa. (Si sa che la gente da buoni consigli se non piu puo dare cattivo esempio. People only give good advice when they can no longer set a bad example.)


Ingredients (makes slightly over 1 kg, enough to fill three 1 lb jars)
350ml cider vinegar
350g brown sugar
250g sultanas
4 tsps minced ginger
1kg cooking apples
400g pears
1 large onion
good pinch of salt
8 cloves
1 stick of cinnamon
20 coriander seeds
20 allspice berries

Method
  1. Put the cloves, cinnamon, coriander seeds and allspice berries in a muslin bag.
  2. Combine the vinegar, sugar, sultanas, ginger and salt into a large, heavy-bottomed saucepan, and add the spices in their bag.
  3. Peel and roughly chop the onion, and add to the saucepan.
  4. Core and peel the apples and pears, chop roughly, add to the saucepan and mix well.
  5. Bring to boil, reduce heat to minimum and simmer for 1 to 2 hours, stirring frequently. When the chutney can be parted with a wooden spoon to reveal the bottom of the saucepan, it is ready.
  6. Transfer to sterilised jars, seal and store for at least 2 weeks (longer if possible).
Apple source
The apples for this recipe came from Bernie and Bruce, the parents of Sammy and Carmela's friend, Callum. They were knobbly little things (the apples, not Bernie and Bruce) but taste great.

Thursday, September 22, 2011

Taiwanese beef noodle soup

I was in the butcher's today and saw what was described as "runner beef". I'm not quite sure what cut it is (should have asked) but it was cheap and looked as if it would add plenty of flavour to a soup.


When I got home, I did a bit of googling, and came up with a recipe for Taiwanese spicy beef noodle soup or niu rou mian, which I adjusted a little bit both to reflect the contents of my cupboards and in an attempt to please the delicate palates of my children.


Ingredients
vegetable oil
1 kg runner beef (or another cheap cut)
1 large leek, roughly chopped
4 cloves garlic, peeled and roughly chopped
1 tsp minced ginger
1 tsp red chile bean sauce
4 tbsps rice wine
1/2 tsp five spice powder
1 tsp allspice berries
1 tbsp dark soy sauce
3 tbsps light soy sauce
2 litres of water
plus
500g of broccoli, cut into bite-size pieces
250g of thick egg noodles noodles

Method
  1. Heat a few tablespoons of vegetable oil in a large pot and brown the beef thoroughly.
  2. Add all the remaining ingredients (except for the broccoli and noodles), bring to boil, cover and turn to minimum, and simmer gently for 2-3 hours until the meat is completely tender.
  3. Set lid ajar and allow to cool, then strain the broth into a large bowl. Take out the beef and set aside. Discard the other contents of the strainer (spices, leeks, garlic, ginger etc.).
  4. Return broth to pan, bring to boil, add broccoli and noodles and cook until tender.
  5. Meanwhile, remove beef from bone, trimming off the fat and any gristle, and cut into thinnish slices.
  6. Ladle the broth with noodles and broccoli into soup bowls, add beef slices and serve.
Three cheers for Taiwan
Apparently this is the national dish of Taiwan. To do it justice, I decided to buy the most expensive noodles in my local Chinese supermarket - a Taiwanese brand which cost somewhere between two and three times as much as the alternatives. I was not disappointed, as they were also at least two to three times as good! If you can get hold of them, these are the ones to go for:


Sunday, September 4, 2011

Raspberry jam

We had a second trip to Craigie's Farm to pick some more strawberries, together with some raspberries (which were not yet ready on our first visit). I was really enjoying picking the raspberries at a very leisurely pace, but made the mistake of bringing four over-enthusiastic helpers with me. While I was strolling up and down between the raspberry canes, picking only the very best fruit at a rate of about one berry per minute, they were galloping through the strawberry tunnel and came back with 5 kilos of the things, no less! They then applied the same treatment to the raspberries and within half an hour we had another 5 kilos of them. "You've got to take advantage while they're in season!" they chorused. I said nothing but groaned inwardly, thinking of the little red hen and her farmyard friends. At least they hadn't actually loaded her down with industrial quantities of wheat.


Sure enough, when we got back home my 'helpers' melted away, leaving me alone in the kitchen with an unfeasible amount of soft fruit. I churned out a couple of batches of strawberry jam, and also did a large (2kg) batch of raspberry, before reluctantly freezing the remaining rasps. And the next day, trying to get at least a token contribution to the whole process, I was flatly informed that writing labels was "boring". Well, I shall label them myself: "Tim's Solo Raspberry Jam".

Ingredients
1kg fresh raspberries
1kg sugar

Method
  1. Put a dinner plate in the freezer. Sterilise your equipment: 4 x 1 lb jars and lids or 8 x 1/2 lb ones, a ladle and a jam funnel. I sterilise the jars by washing them then placing them upside down on the oven rack, setting the oven to 140oC and keeping them there for 30 minutes or so.
  2. Measure the sugar in to a heatproof bowl, and heat for 5 minutes or so in the oven.
  3. Put the raspberries in a large, heavy-bottomed saucepan, heat until the juices begin to run, then add the warmed sugar.
  4. Bring to a boil, skim, and boil for 5 minutes or so, until setting point has been reached. To test for set, drip a couple of drops of the jam onto the cold plate. Leave to cool for a few seconds. If it is ready, then the surface will wrinkle when you push the drop with your fingernail. (Or you can just stick your finger in it and see if it has a slightly sticky, jammy consistency rather than a syrupy one.)
  5. Remove pan from heat and leave to sit for 10 minutes before ladling the jam into the sterilised jars and sealing.

Friday, September 2, 2011

Damson, greengage and apple chutney

As part of my ongoing battle against the fruit mountain which has been threatening to overwhelm us, I made some chutney yesterday. The main ingredients were just what I reckoned was least likely to be eaten if I didn't cook them.


Ingredients (makes 1 kg)
500g granny smiths
250g greengages
250g damsons
8 spring onions
125g sultanas
175g brown sugar
200ml cider vinegar
good pinch of salt
4 cloves
1 stick of cinnamon
10 coriander seeds
10 allspice berries
2 slices of fresh ginger

Method
  1. Put the spices in a muslin bag. Core and peel the apples and dice. Cut the damsons in half, removing stones if possible. (If not, remove after cooking). Cut greengages into four, removing stones. Top and tail the spring onions, and cut into 1 cm segments.
  2. Put all the prepared fruit, the spice bag, the sugar, vinegar and salt into a small, heavy-bottomed saucepan. Bring to boil, reduce heat to minimum and simmer for 1 to 2 hours, stirring frequently. When the chutney can be parted with a wooden spoon to reveal the bottom of the saucepan, it is ready. Transfer to sterilised jars, seal and store for at least 2 weeks (longer if possible).

Thursday, September 1, 2011

Pineapple salsa

We are caught in the middle of a fruit glut at the moment. Yesterday we went to a pick your own farm and returned with 5 kg of strawberries and another 5 kg of raspberries. When we got back, our veggie box was waiting on our doorstep, brimming with apples, bananas, pears, damson and greengages, together with the usual vegetables. And when I opened the fridge to try to clear some space for them, I was confronted by a pineapple staring aggressively back at me.


I thought about making a batch of pineapple picalilli, but as I was already planning to make some chutney with the damsons and greengages, pickle the pears, and produce industrial quantities of strawberry and raspberry jam, I decided to go for something a little less labour-intensive. A bit of googling and some improvisation on my part produced this pineapple salsa.

Ingredients
1 pineapple
4 tsps of minced red chilli
4 finely chopped spring onions
3 tsps of salt
juice of 2 limes
half a large bunch of coriander (or a couple of miserly supermarket packs)

Method
  1. Remove the skin from the pineapple, cut into quarters, remove the fibrous core, and chops the flesh into small chunks.
  2. Combine in a large bowl with the rest of the ingredients, stir well to mix, and leave to rest for 30 minutes to allow the flavours to develop.

Monday, August 1, 2011

Okra with tomatoes and coriander

Okra, bhindi, ladies' fingers - we haven't quite settled on a name, but these are one of my very favourite vegetable. In my opinion, the trick is not to overcook them, so that they have a good fresh taste, and a bit of crunch.


Ingredients
500g fresh okra
500g tomatoes
1 onion
3 tbsps vegetable oil
2 tsps minced ginger
2 tsps minced green chilli
1/2 tsp salt
half a large bunch of coriander (or 2 of those miserly packs they sell in supermarkets)

Method
  1. Wash the okra, then top and tail them and cut them into 2-cm long segments. Slice the onion into strips. Cut the tomatoes lengthwise into 8 segments.
  2. In a wok or large frying pan, heat the oil, and fry the onion until it starts to brown. Add the ginger and chilli, fry for a few seconds more, then add the okra, and stir-fry for 5 minutes.
  3. Add the tomatoes and chopped coriander leaves, and fry for another 5 minutes.

Carrot, lentil and red pepper soup

Since our weekly veggie box started arriving, I have been inspired to start making more soup. I've always loved soup and as a kid, I often had a tin of Baxter's soup for breakfast or lunch. Below, you can see me posing with two of my childhood favourites - cock-a-leekie and oxtail - in the Baxter's shop at the Ocean Terminal centre, in Edinburgh.


Anyway, back to the recipe. Looking into the fridge, I realised I still had 500g of carrots waiting to be used, together with a slightly wrinkly red pepper, so this is what I came up with.

Ingredients
1 large onion
1 red pepper
1 clove of garlic
olive oil
2 tsps cumin powder
500g carrots, peeled and sliced
100g red split lentils
1 litre stock
1/2 tsp of chilli sauce
salt to taste

Method
  1. Chop the onion, red pepper and garlic, and fry gently in plenty of olive oil until the onion has softened.
  2. Add the cumin powder and fry for a few seconds.
  3. Add the carrots, lentils, stock and chilli sauce, bring to a boil, cover and simmer gently for 45 minutes.
  4. Allow the soup to cool a little, blend with a stick blender, check for seasoning and add more salt if necessary. Serve with plenty of crusty bread.


Underage drinking
When I was growing up in Stirling, I would sometimes make a big pot of tomato and potato soup for me and my friends to eat when we had got back from the pub after a spot of underage drinking. There was a more or less recognised hierarchy of places where you could drink: you started off in the Allan Park, whose downstairs bar would serve 15 year olds at a pinch, while the upstairs bar was curiously a policemen's local, then graduated onto another place at 16 (whose name I have forgotten), before being ready for the trendy Barnton Bar & Bistro at 17.

Friday, July 29, 2011

Pickled cucumbers with dill, garlic and horseradish

The two large jars of cucumbers I pickled last week were so good that they have already disappeared, so it was back to my local Polish deli for more supplies. Along with a couple of kilos of pickling cucumbers, I got a bundle consisting of some dried, stalks of bolted dill, a head of garlic, and a length of dried horseradish.


Ingredients
2 kg of pickling cucumbers
4 cloves of garlic
dried bolted dill stalks
6-inch piece of horseradish root
1500 ml of boiling water
3 tbsps of salt
3 tbsps of sugar
12 tbsps of cider vinegar

Method
  1. Sterilise 4 good-sized pickling jars, with their lids.
  2. Allow to cool a little, then pack the cucumbers into them.
  3. Into each jar, place 1 peeled garlic clove, a 1-inch piece of horseradish root, and 3 or 4 lengths of dill stalk.
  4. Dissolve the salt and sugar in the boiling water, and add the vinegar.
  5. Pour the pickling liquid over the cucumbers, seal the jars and store for 2 days at room temperature and at least 1 week in the fridge.
Passing
I don't know why, but I felt rather pleased when the shop assistant in the deli addressed me in Polish, even though I think she was just asking me to get out of the way so she could get back to the till.

Strawberry jam

I've been wanting to make jam for ages - it seems the natural accompaniment to my bread baking and pickling exploits - so we all headed off to Craigie's "pick your own" farm out by South Queensferry. Before going, I'd checked my recipe books, and trusty Darina Allen of the Ballymaloe Cookery School had assured me that raspberry jam was the best for beginners, as strawberry jam could be a bit tricky. But when we arrived at the farm, there was barely a raspberry in sight. I was doubly disappointed: not only was I not going to be able to make my "beginners' jam", I was also going to have to bend for strawberries (raspberries grow on canes, so you can pick them standing, whereas strawberries are found underneath very low bushes).


We headed off to the strawberry fields, and I was soon cheered up by the realisation that I could actually pick the strawberries while lying down, popping the odd one into my mouth as I went. This is my kind of farming! After about an hour, of hard, supine labour, we had almost 3 kilos of little, ripeish strawberries. (For jam, it's important that your fruit is not overripe or bruised.)

Back in the kitchen, I checked my recipes again, but Darina Allen was prescribing redcurrant juice and more lemons than I had, so it was time to google. After a bit of searching, I finally hit upon Sophie Grigson on the BBC. I had all the ingredients, the recipe seemed nice and easy to follow, and best of all I had to leave the strawberries soaking in sugar overnight, which got me off the hook of actually making the jam that evening.

Ingredients
1 kg of unblemished, ripe(ish) strawberries [weight after preparation]
1 kg of caster sugar
juice of 1 lemon
small knob of butter

Method
  1. Remove the stalks from your strawberries. Cut larger fruit into halves or quarters; leave very smal ones whole. Put the fruit into a large bowl, add 500g of sugar, cover with clingfilm and leave in the fridge overnight.
  2. The next day, put a plate in your freezer (you will need this to test the setting point) and sterilise your jars and any other equipment as follows: wash well, rinse, place upside down on a rack in your oven, heat the oven to 140oC, and once it has reached temperature, keep there for 30 minutes.
  3. Meanwhile, put the strawberry and sugar mixture into a very large saucepan (or a jam pan, if you have one), add the remaining 500g of sugar and the lemon juice and stir very well, over a low heat until all the sugar is dissolved.
  4. Turn the heat up and bring to a boil. If you have a cooking thermomenter, once the temperature reaches 105 oC, you can start testing for the setting point, as follows: drip a couple of drops of the jam 'juice' onto the cold plate. Leave to cool for a few seconds. If it is ready, then the surface will wrinkle when you push the drop with your fingernail. (Or you can just stick your finger in it and see if it has a slightly sticky, jammy consistency rather than a syrupy one.) It may take a good 20 minutes of boiling to reach the setting point; keep testing at regular intervals and make sure you don't overcook it.
  5. When your jam has reached setting point, turn off the heat, stir in a small piece of butter, skim off any scum on the top, and allow to sit for 10 minutes.
  6. Ladle the jam into the sterilised jars (using a jam funnel if you have one), cover with a wax lid, and put a lid on the jar while still hot.


sterilising


soaking strawbs

Wednesday, July 27, 2011

Polish-style pickled cucumbers

When I left Edinburgh, the Polish influx was just getting started. Six years later, the Polish community is well and truly established, and is served both by a number of specialist Polish delis and by little Polish sections in most supermarkets and convenience stores. The other day, I was heading for the Chinese supermarket when I stopped into my nearest Polish shop. My eyes were instantly drawn to a couple of big baskets of very fresh looking pickling cucumbers, and I supplemented some of these with a bag of fresh dill.


Ingredients
12 pickling cucmbers (between 8 and 15 cm in length)
500 ml of boiling water
1 tbsps of salt
1 tbsp of sugar
4 tbsps of good quality cider or white wine vinegar
2 cloves of garlic, peeled
8 sprigs of fresh dill

Method
  1. Put the water, salt and sugar in a pan. Bring gently to a boil, stirring so that the salt and sugar are dissolved, turn off, add the vinegar and allow to cool a little.
  2. Clean the cucmbers and distribute them between 2 large or 3 medium-sized sterilized jars. Add the garlic and fresh dill, pour the pickling solution over the cucumbers so that they are completely covered, and seal the jars.
  3. Keep at room temperature for 2 days, then store in the fridge for 1 week. The cucumbers are now ready to eat - they should taste fresh and cruncy.
In a pickle
I have a long-standing if rather intermittent love affair with pickling. I first pickled things when I was at university - peppers, cucumbers, onions, eggs (lots of eggs!) and even an octopus. I have particularly fond memories of the octopus. It was truly delicious - simmered in vinegar with plenty of herbs and some delicate spices, then preserved in oil and left to mature for 6 weeks. Shortly before making it I had been out flyposting for a CND rally (summer of 1985) and me and my friend Angus were spotted and threatened by the local criminals who, unknown to us, controlled the flyposting business in south Manchester. When I got home feeling a little shaken, I remembered the octopus in my fridge and decided to do some therapeutic cephalopod preservation.

Friday, June 24, 2011

Partridges stewed in oil and vinegar

The other day Gemma came back from the market with a little bag containing three frozen partridges which our butcher had persuaded her to buy. We were already in pre-removals stage, the house was full of boxes and the store cupboards were running bare, but fortunately we still had the basic ingredients for a Spanish classic: perdices en escabeche.


Ingredients
4 partridges
2 large onions
4 cloves of garlic
6 bay leaves
2 sprigs of fresh rosemary
250 ml olive oil
150 ml balsamic vinegar
200 ml water
1 tsp salt

Method
  1. Cut the partridges in half lengthwise, remove any stubborn feathers that may remain on the legs or wings, and clean thoroughly. In a large pan, brown the partridge halves well on both sides, and remove.
  2. Slice the onions crosswise into rings, and slice the garlic. Pour the oil into a large saucepan, fry the onion and garlic gently, then add the browned partridges together with any juices which have accumulated, and add the herbs, vinegar, oil and salt.
  3. Cover the pan, bring to a simmer, reduce to minimum and cook for 1.5 hours.
  4. The partridges can be served hot, but I think they are actually best eaten cold a couple of days later - perfect for a posh picnic.
Happily ever after
This seemed like the perfect dish on which to end the Cadiz stage of my blog. Spanish fairytales end "y fueron felices y comieron perdices", which translates literally as "and they were happy and ate partridges". We are now heading back to Scotland for the foreseeable future, so this isn't so much the end of one story as the start of a new one, but I think the sentiment still applies.

Monday, June 6, 2011

Hot cross buns

One way of celebrating Easter is to dress up in a Ku Klux Klan costume and march around the street in the middle of the night carrying a giant statue of the Virgin Mary to the accompaniment of a discordant brass band:


Or you can just make some hot cross buns:

Ingredients 

For the dough
375g warm milk
15 g of fresh yeast (or 7 g of dried active yeast)
30g brown sugar
2 tsps mixed spice
150g large raisins
zest of 1 lemon
3 tbsps sunflower oil
1 egg
650g strong white flour
5g salt

For the glaze
100g light brown sugar
100g water

For the pastry cross
75g plain flour
75g water

Method
  1. Measure the milk into a large bowl. Add the yeast, whisk well so that it is dissolved. Add the sugar, mixed spice, raisins, lemon zest, sunflower oil and 1 egg, and whisk to mix. Add the flour and salt, and mix well.
  2. Work the dough in the bowl or on a worktop until it is smooth. Return the dough to the bowl, cover, and leave to stand for an hour.
  3. Transfer the dough to a well-floured surface, bring it together into a ball, then divide it into 12 portions. Form each portion into a small round boule or bun, and place the buns, evenly spaced, onto a lightly oiled, floured baking sheet. Put the sheet inside a large plastic bag, making sure that the plastic is not in contact with the dough. Leave the buns to rise for 1 hour.
  4. When the buns have been rising for 30 minutes, set the oven to 190°C. 
  5. To make the glaze, mix the brown sugar and water, and heat gently until all the sugar has dissolved to form a very runny syrup. 
  6. Mix the plain flour and water together to make a stiff batter, then pipe it slowly onto the buns to make crosses. (If you don't have a piping bag, just use a freezer bag with the corner snipped off.)
  7. Glaze the buns with plenty of the syrup.
  8. Put the tray of glazed buns in the oven and bake for 20 minutes until they are golden brown. 
  9. Remove the buns from the oven, apply a second coat of glaze and eat hot or leave to cool on a wire rack.

Friday, June 3, 2011

Scotch pancakes

After many years of staunchly preferring thin English pancakes or French-style crepes, my kids have suddenly flipped over and been converted to the juicy wonders of Scotch pancakes (or fat pancakes, as they call them). This is the recipe they use.


Ingredients
200g self-raising flour
1/2 tsp baking powder
pinch of salt
300g milk
2 eggs
1 tsp vegetable oil

Method
  1. Sift the flour into a large bowl. Add the baking powder and salt, mix well.
  2. Whisk the eggs thoroughly.
  3. Add the milk, eggs and vegetable oil to the flour and mix until you have a smooth, thick batter. Leave to stand for 5 minutes, until the surface is covered with little bubbles.
  4. Heat a lightly oiled, non-stick frying pan. When it is hot, pour half a ladle of pancake batter into it and cook for between 30 seconds and 1 minute. Flip over, and cook for another 30 seconds or so.

Monday, May 30, 2011

Fried forest oysters

I love the big oyster or similar mushrooms (sold as 'setas' in Spain) but I'm never quite sure what to do with them, other than grilling or frying them with garlic. Recently, however, as part of our family's River Cottage addiction, I saw Hugh Fearnley-Whittingstall breading and frying some wild mushrooms, and thought I would give it a try. The result was great - there was a really good contrast between the juicy mushroom and the crispy coating, and none of the bitterness you sometimes get with mushrooms - all of which just confirms the value of the motto: "when in doubt, fry it".


Dragon balls and lion's heads
I also like the fact that these look exactly like the pollo empanado or breaded chicken fillets, so beloved by Spaniards. And so, in the best spirit of Chinese restaurant menus everywhere, I have dubbed them fried forest oysters. (Thanks to Madalen for helping me work out what they were - see comments below. I am a complete mushroom ignoramus, so anything beyond a button mushroom has me stumped!)


Ingredients
0.25 kg oyster mushrooms
4 eggs
plenty of dried breadcrumbs
salt
olive oil for frying

Method
Wipe the mushrooms clean, remove any woody bits of stalk and trim the ends if the mushrooms are not in tip-top condition, then cut each mushroom lengthewise into 2 or 3 wide strips. Dip the mushrooms in egg, then breadrcrumbs and fry in plenty of olive oil until golden and crispy on both sides. Remove to a plate, sprinkle with plenty of salt, and serve.

Portion control
The oyster mushrooms are light and soak up a lot of egg (in their gills) and breadcrumbs, so 1/4 kg goes quite a long way and would be a reasonable main course for two hungry adults or a starter for four.


A taste of Serbia
I sometimes have a quick google to see if something I have come up with is already out there. I've been gratified so far to find that my rabbit dhansak and snail pakora are unique creations, but it's also nice when the opposite happens. Apparently breaded oyster mushrooms are popular in Serbia, where they go by the name of Pohovane bukovače. Not a lot of people know that!

Saturday, April 9, 2011

Homemade baked beans

I got back from a great day at the beach and, although Gemma had supper in hand, my creative juices were flowing so I decided to have a bash at making my own baked beans. (I can buy the Heinz variety here, but they are fiendishly expensive and my gastronome kids refuse to eat them anyway.)


Kitchen impro
I wanted something that was sweet, salty and a little spicy, and this was what I came up with. I was pretty pleased, as it was exactly what I had been aiming for. Like all my best kitchen improvisations, I started with a clear idea of what I wanted the final dish to be like, then paused for a few minutes and thought about how to get there. A lot of perfectly competent cooks rarely improvise, and I think part of the reason why is because they get stuck between two extremes: carefully following a time-honoured recipe, or more or less randomly throwing together whatever ingredients they happen to find in their fridge and cupboard. Of course, if you take the second approach then nine times out of ten what you produce will barely be worth eating and you will slink chastened back to your cookbooks, but the solution is just to gather your thoughts before you get going and to think about how the ingredients you use will combine together.

Ingredients
olive oil
2 small onions
2 cloves of garlic
2 tins of chopped tomatoes
4 tsps paprika
1 tsp ground ginger
1 tsp hot chilli sauce
1 tsp salt
2 tbsps dark soy sauce
2 tbsps honey
3-4 tins of cannellini beans (1200g drained weight)

Method
  1. Chop the onion very finely and fry gently in plenty of olive oil. When the onion is done, add the peeled, finely chopped garlic cloves and continue to fry until the onions are just starting to brown.
  2. Add the chopped tomatoes, paprika, ginger, chilli sauce and salt, bring to a boil, turn to minimum, cover and simmer for 30 minutes.
  3. Add the soy sauce, honey and drained beans, cover and cook at minimum for another 10 minutes or so.

To complete my 'homemade' feeling, I decanted my beans into jars.

Monday, April 4, 2011

Carmela's BBQ chicken kebabs

As Sammy has his own kebab recipe, I thought it only fair that Carmela should have one too, so this is what we came up with. We took these camping with us and we didn't get any shots of the food, but I did catch Carmela loosing off an arrow.


Ingredients
1 kg skinless chicken breast
4 tbsps tomato sauce
1 tbsp dark soy sauce
1 tbsp honey
1 tsp sesame oil


Method
  1. Cut the chicken into chunks.
  2. Mix the tomato sauce, soy sauce, honey and sesame oil together.
  3. Pour over the chicken pieces, mix well and leave to marinade (anything from 30 minutes to overnight).
  4. Preheat the oven to 220oC, and line an oven tray with lightly greased foil.
  5. Thread the chicken pieces onto skewers, and cook in the hot oven for 12 minutes.

Friday, March 25, 2011

Sammy's chicken kebabs

Sammy and Carmela are gradually doing more and more cooking, and right now this is Sammy's favourite thing to do with chicken.


Ingredients
1 kg skinless chicken breast
juice of 1/2 lemon
6 tbsps of natural yoghurt
2 tbsps of chickpea flour
1-inch piece of ginger, peeled and finely chopped
4 garlic cloves, peeled and finely chopped
1/2 tsp chilli powder
1/2 tsp turmeric
1 tsp ground cumin
1 tsp garam masala
1 tsp salt

Method
  1. Cut the chicken into chunks, put in a bowl and mix well with the lemon juice.
  2. Mix the yoghurt and the chickpea flour, then add the ginger, garlic, spices and salt, and mix well. Pour over the chicken pieces, mix well and leave to marinade (anything from 30 minutes to overnight).
  3. Preheat the oven to 220oC, and line an oven tray with lightly greased foil.
  4. Thread the chicken pieces onto skewers, and cook in the hot oven for 12 minutes.

Friday, March 18, 2011

Rabbit dhansak

I have mixed feelings about market shopping: it's time-consuming and can be both physically and mentally exhausting, as you struggle to make sure the stallholders don't palm off shoddy produce on you and have to adapt your cooking to what's available. But when I'm in the right mood, I find it really stimulating. I often have great recipe ideas while looking at what's on display, sometimes directly inspired by whatever is laid out in front of me, and sometimes taking advantage of a bit of daydream time while I wait to be served.


When I got back to Spain from Italy the other day, the first thing I did (after frantically feeding the washing machine and hanging up wet clothes) was to pop down to the market. In the fish section, I bought a kilo of clams. And at the butcher's I picked up a beautiful free-range chicken, which I intend to do al ajillo but with the added twist of a pickled lemon, and I also got some pork ribs, which I plan to pressure cook with chilli and ginger. My final purchase was a free-range rabbit, but instead of doing my usual coniglio alla cacciatore, I thought I would do a bit of fusion cooking, so I came up with this rabbit and brown lentil curry. I don't know if this really qualifies as a dhansak or not (usually, I think, a meat curry where the sauce is thickened with red lentils) and I don't care either.

Ingredients
1 onion
4 cloves of garlic
2-inch piece of fresh ginger
6 tablespoons of vegetable oil
4 teaspoons of mild curry powder
1/2 teaspoon of salt
1 free-range rabbit, jointed
250g brown lentils
800 ml of chicken stock
juice of 1/2 lemon
small bunch of fresh coriander

Method
  1. Peel and finely chop the onion, garlic and ginger, and puree in a food processor with the vegetable oil.
  2. Gently fry the puree in an open pressure cooker, being careful not to burn.
  3. When the onion is turning golden, add the curry powder and salt, fry for another 30 seconds, then add the rabbit pieces and fry for a minute or so, turning them so that they become well coated with the onion and spice mixture.
  4. Add the lentils, chicken stock and lemon juice, close the pressure cooker and bring up to full pressure (2 rings). Cook for 15 minutes, then cool the cooker under runninng cold water.
  5. Open, check for seasoning, add chopped coriander and serve.

Googlecooked!
Googlewhacking is the sport of trying to find an elusive query (two words - no quote marks) with a single, solitary result. Googlecooking is the art of producing a recipe (two-word title - yes quote marks) for which there are no other hits. I give you "rabbit dhansak"!

Thursday, March 17, 2011

Clam and potato stew

I'm always intrigued by how certain combinations of food become fixed. It's more obvious in Spain, where there is both a more extensive repertoire of traditional dishes and a more conservative approach to cooking (facts which I guess are related).


I was in the market today shopping for fish and, as usual, not quite sure what to buy when I spotted some nice-looking clams at 6 euros a kilo. I usually just cook clams a la marinera, with paprika and sherry, but I wanted something that would turn them into a one-pot meal. At first, I thought about doing them with rice, but then it struck me that they would be good in a potato stew. In Cadiz, the usual thing to combine with potatoes like this is cuttlefish (papas con choco) but it worked very well with the clams and I will definitely be repeating this one. I think I might also try to work out a curried version with coconut milk and turmeric at some point.

Ingredients

1 head of celery
2 cloves of garlic
olive oil
2 teaspoons of smoked paprika
1 teaspoon of cumin
2 kg of potatoes
1/2 kg of green beans
4 ripe tomatoes
1 teaspoon of salt
1 glass of white wine
1 glass of chicken stock (or replace with fish stock or water)
2 bay leaves
1 kg of clams


Method
  1. Clean and chop the celery and garlic, and fry gently in plenty of olive oil.
  2. Peel the potatoes and cut them into large chunks. Cut the green beans into 2-inch segments. Cut the tomatoes into large chunks. Wash the clams thorough in plenty of cold water.
  3. Once the celery begins to soften, add the paprika and cumin and fry for 30 seconds or so before adding the potatoes, beans, tomatoes, wine, stock, bay leaves and salt.
  4. Bring to a boil, turn heat to low, cover and simmer gently until the potatoes are just done.
  5. Add the clams, stir well, cover and continue cooking for a few minutes until all of the clams have opened.

Saturday, March 5, 2011

Pork meatballs with squid, in a green curry sauce

I'm always a little nervous when people introduce me as a foodie. It's true that I love food and love cooking, but I would hesitate to describe myself as a good cook. I'm well aware of my shortcomings - gaps in my knowledge and my technique, and the more than occasional mediocre dish that I produce.


However, every now and then I cook something that makes me think that maybe I do deserve to be described as a good cook. It's usually when I bring together some slightly unusual ingredients in an inspired combination that I have not knowingly copied from anywhere else, and this was the case with this meatball curry that I cooked up this evening, having spent the day out drinking beer on the first Saturday of Carnival. The ingredient which lifts it up onto another level is the inclusion of some squid in the meatball mixture.

Ingredients
meatballs
100g squid, cut into small pieces
1 leek
2 cloves of garlic
1-inch piece of fresh ginger
500g minced pork
2 tbsps light soy sauce
1 tbsp white wine
2 tbsps green chilli chutney (substitute with 1 tbsps of minced green chilli and 1 tbsps lemon juice)
4 tbsps breadcrumbs

sauce
vegetable oil
1 onion

2 cloves of garlic

1-inch piece of fresh ginger
4 kaffir lime leaves
1 stalk of lemongrass
1/2 tin of coconut milk
1 tbsp fish sauce

2 tbsps green chilli chutney (substitute with 1 tbsps of minced green chilli and 1 tbsps lemon juice)


Method
meatballs
  1. Peel and chop the garlic and ginger, and wash and chop the leek. Put the cuttlefish, leek, garlic and ginger into a food processor, and chop finely. Transfer to a large bowl, add the pork, soy sauce, wine, chilli chutney and breadcrumbs, mix well, return to the food processor and whizz briefly.
  2. Form the mixture into walnut-sized chunks and fry in vegetable oil until browned. (You will probably need to do 2 or 3 batches.) Remove to a plate.

sauce
  1. Peel and chop the onion, garlic and ginger, transfer to food processor and chop finely.
  2. In a medium saucepan, fry the onion mixture gently in vegetable oil. Once the onion has softened, add the coconut milk, kaffir lime leaves, lemongrass, fish sauce and green chilli chutney, and stir well.
  3. Bring to a simmer, then add the meatballs, cover the pan and cook for 10 minutes. Serve with rice.